Brighton Garden Renovation
BRIGHTON GARDEN RENOVATION
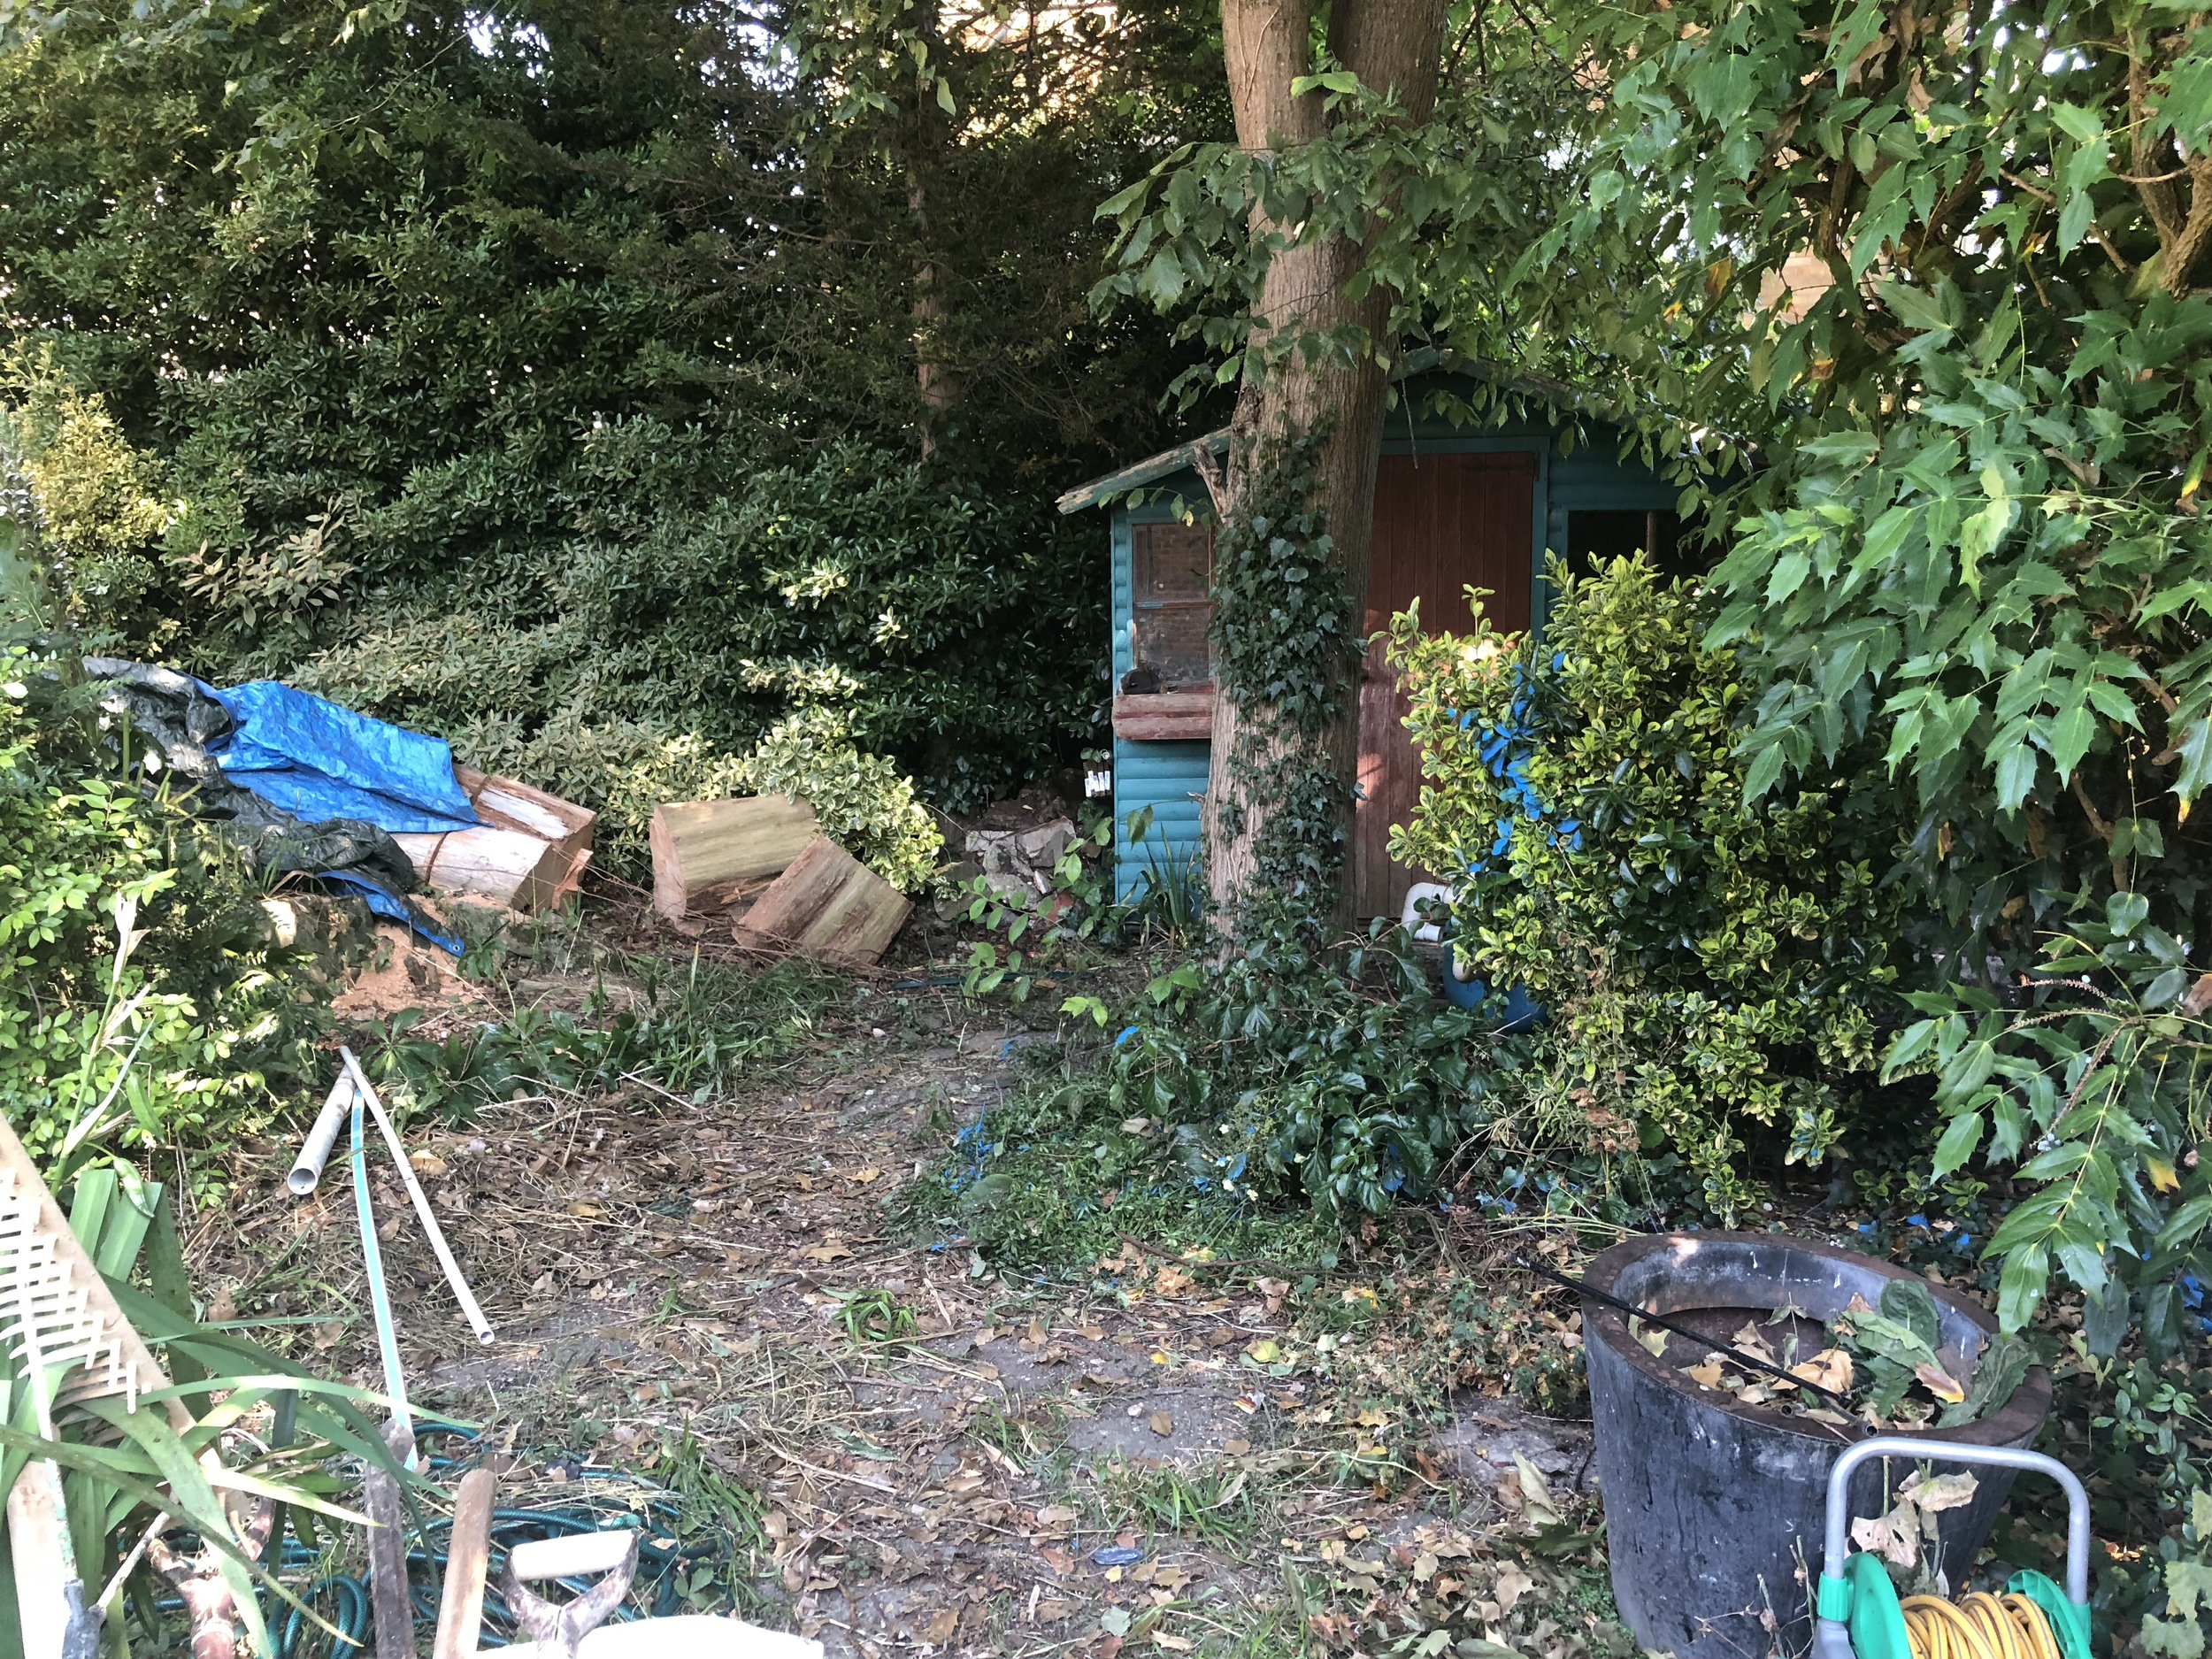
In late June we started working on a garden in Brighton, which was effectively a jungle. The existing pool was more or less a pond, there was hardcore everywhere and the whole area was overgrown.


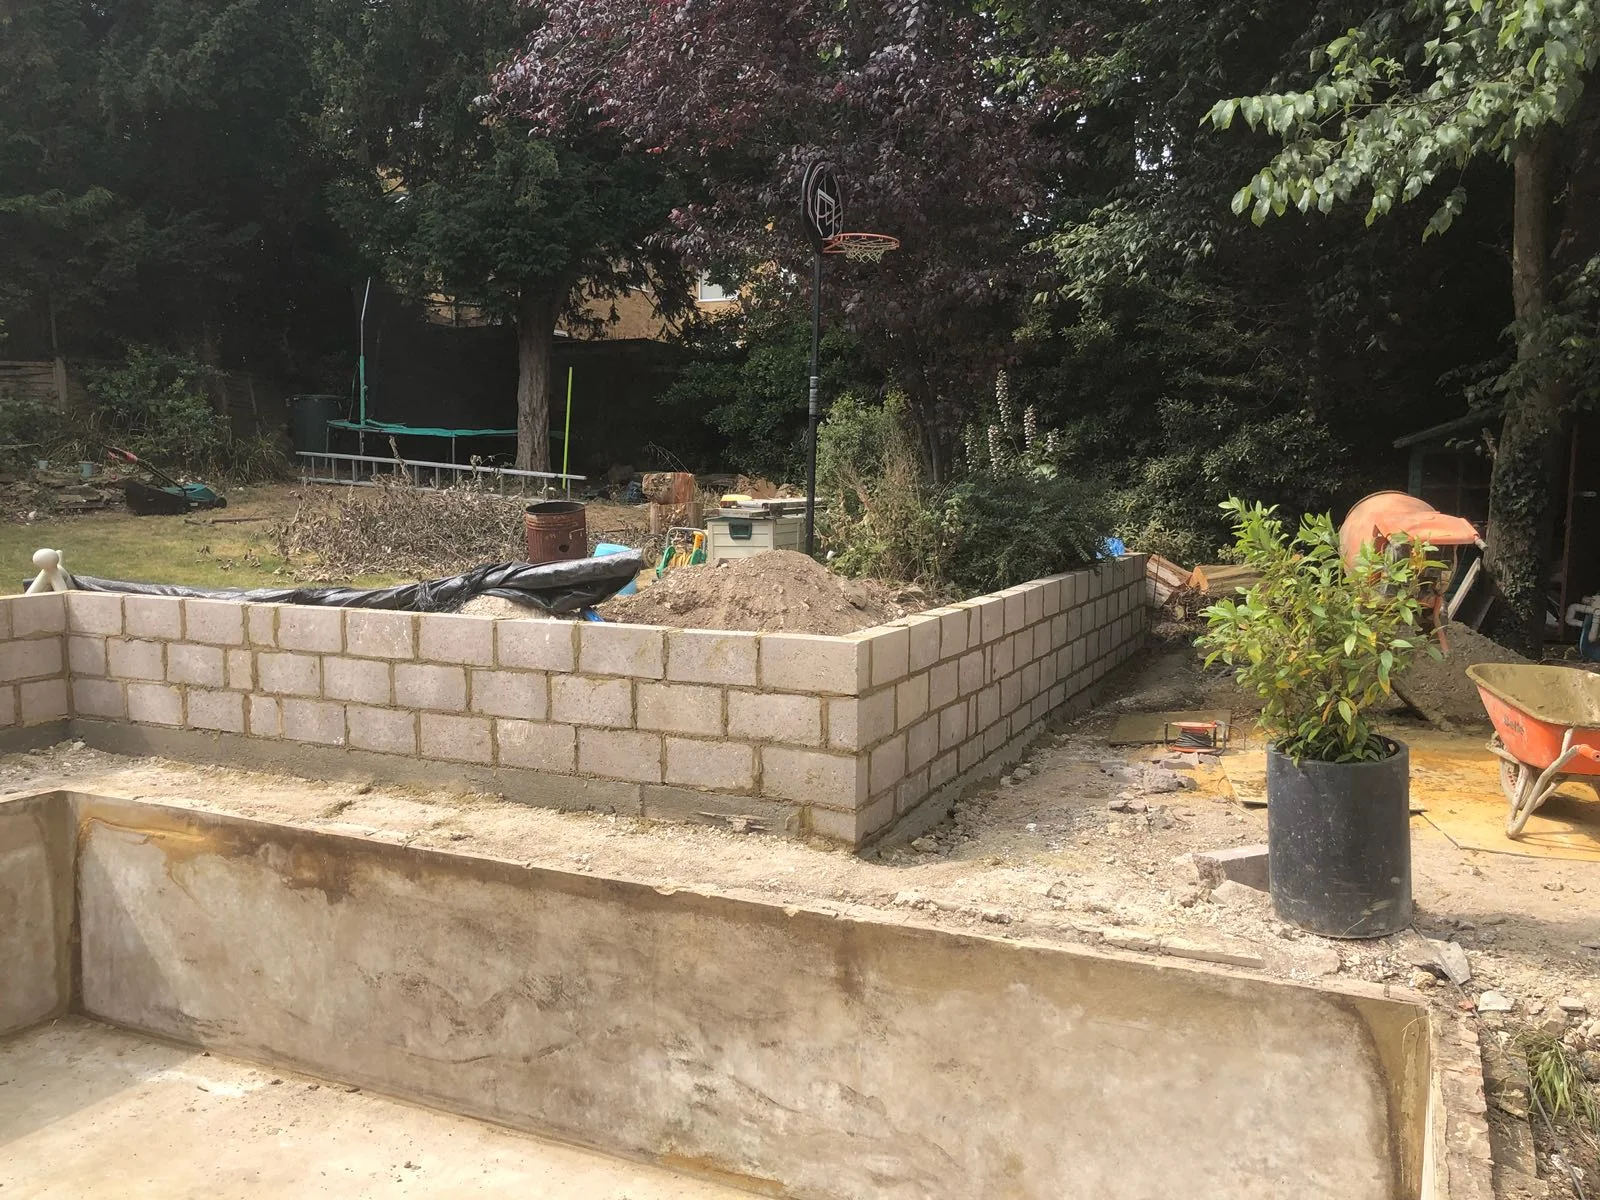
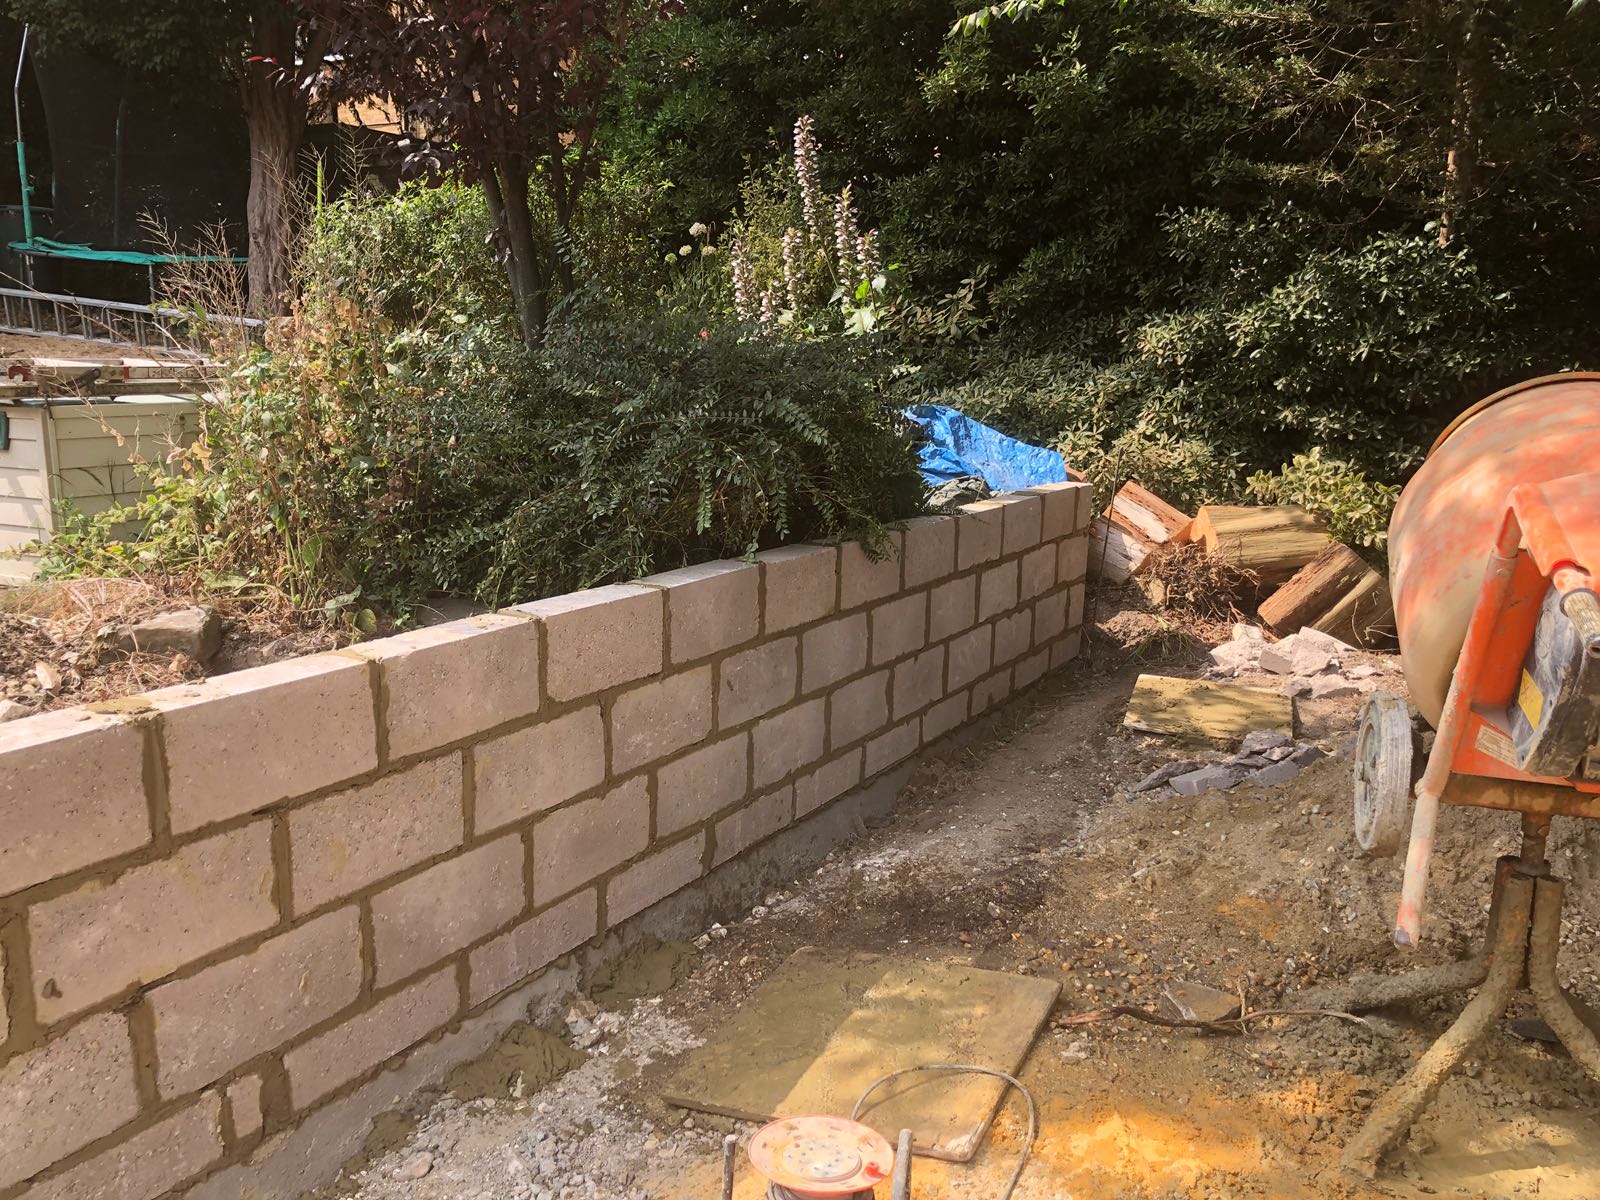
We started with ripping out existing walls/steps, overgrown bushes and trees, as well as digging out sections of the main garden area to make way for new walls and steps. We also had to dig holes to install the new pool house as well as pipework and filters for the pool. Once we had cleared and prepped the area to a rough standard, we began to drain the pool and rip out the old liner. We also started to remove old pool heaters and filters from site as well as filling in an existing pond with bricks and slabs from the previous walls and steps.
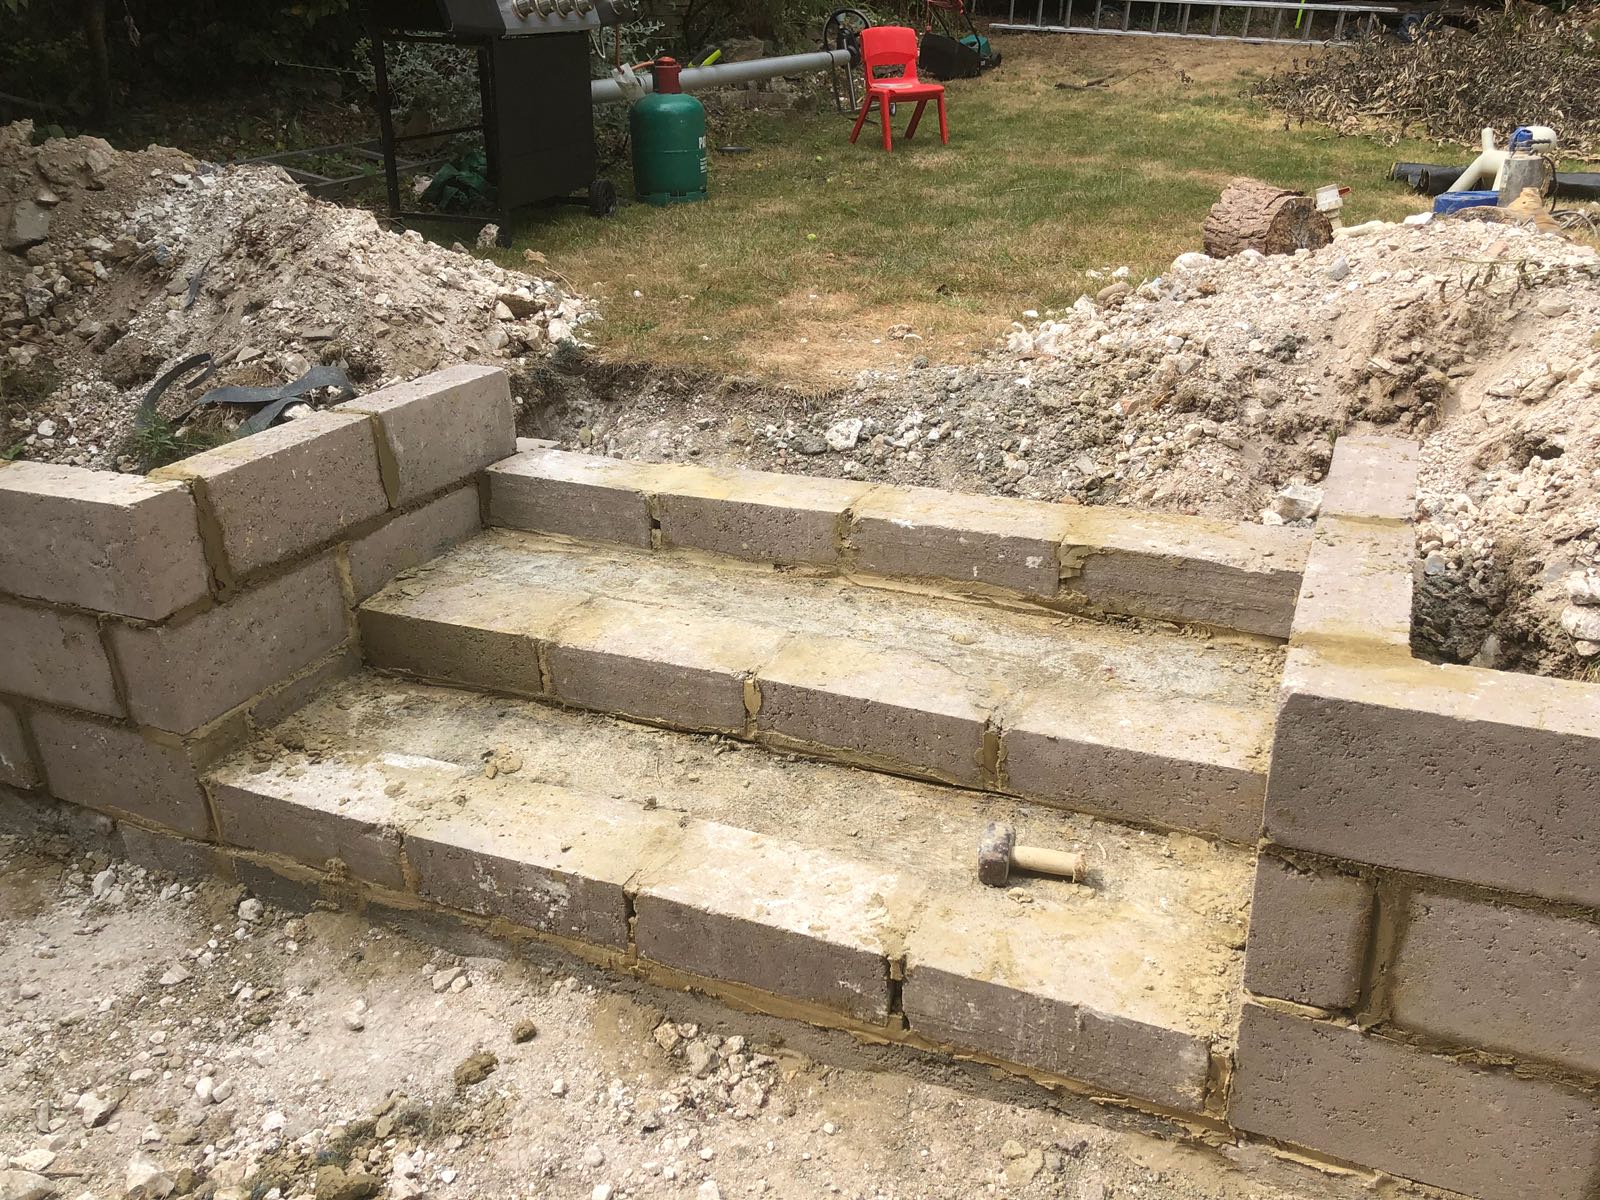
After fully clearing and prepping the area, we began the retaining wall. First the concrete base, followed by the concrete blocks laid on top.


Once the wall was built, we began installing the decking. First the timber framing was installed, levelled and pegged into the ground to keep the structure firm. then the boards could be laid out and screwed down to the frame. alongside installing the decking, we also prepped the pool, cutting out holes for and fitting the new lights, a skimmer and the counter-current cables. once the pool was prepared, it was time to fit the new liner, and then fit the counter current unit to the inside of the pool wall. we fitted the counter current to the brackets on the wall and fed the cables through the already drilled holes.
with the liner and counter current now in place, we began to fill the pool. whilst filling the pool, the weight of the water pushes out the creases in the liner, whilst the pump (seen in the image) sucks out the air between the liner and the pool wall.
Next, we lifted the pool house into its pre dug hole, connected the pipework, levelled it to where paving height would be, and then backfilled around the unit with shingle to hold it in place.
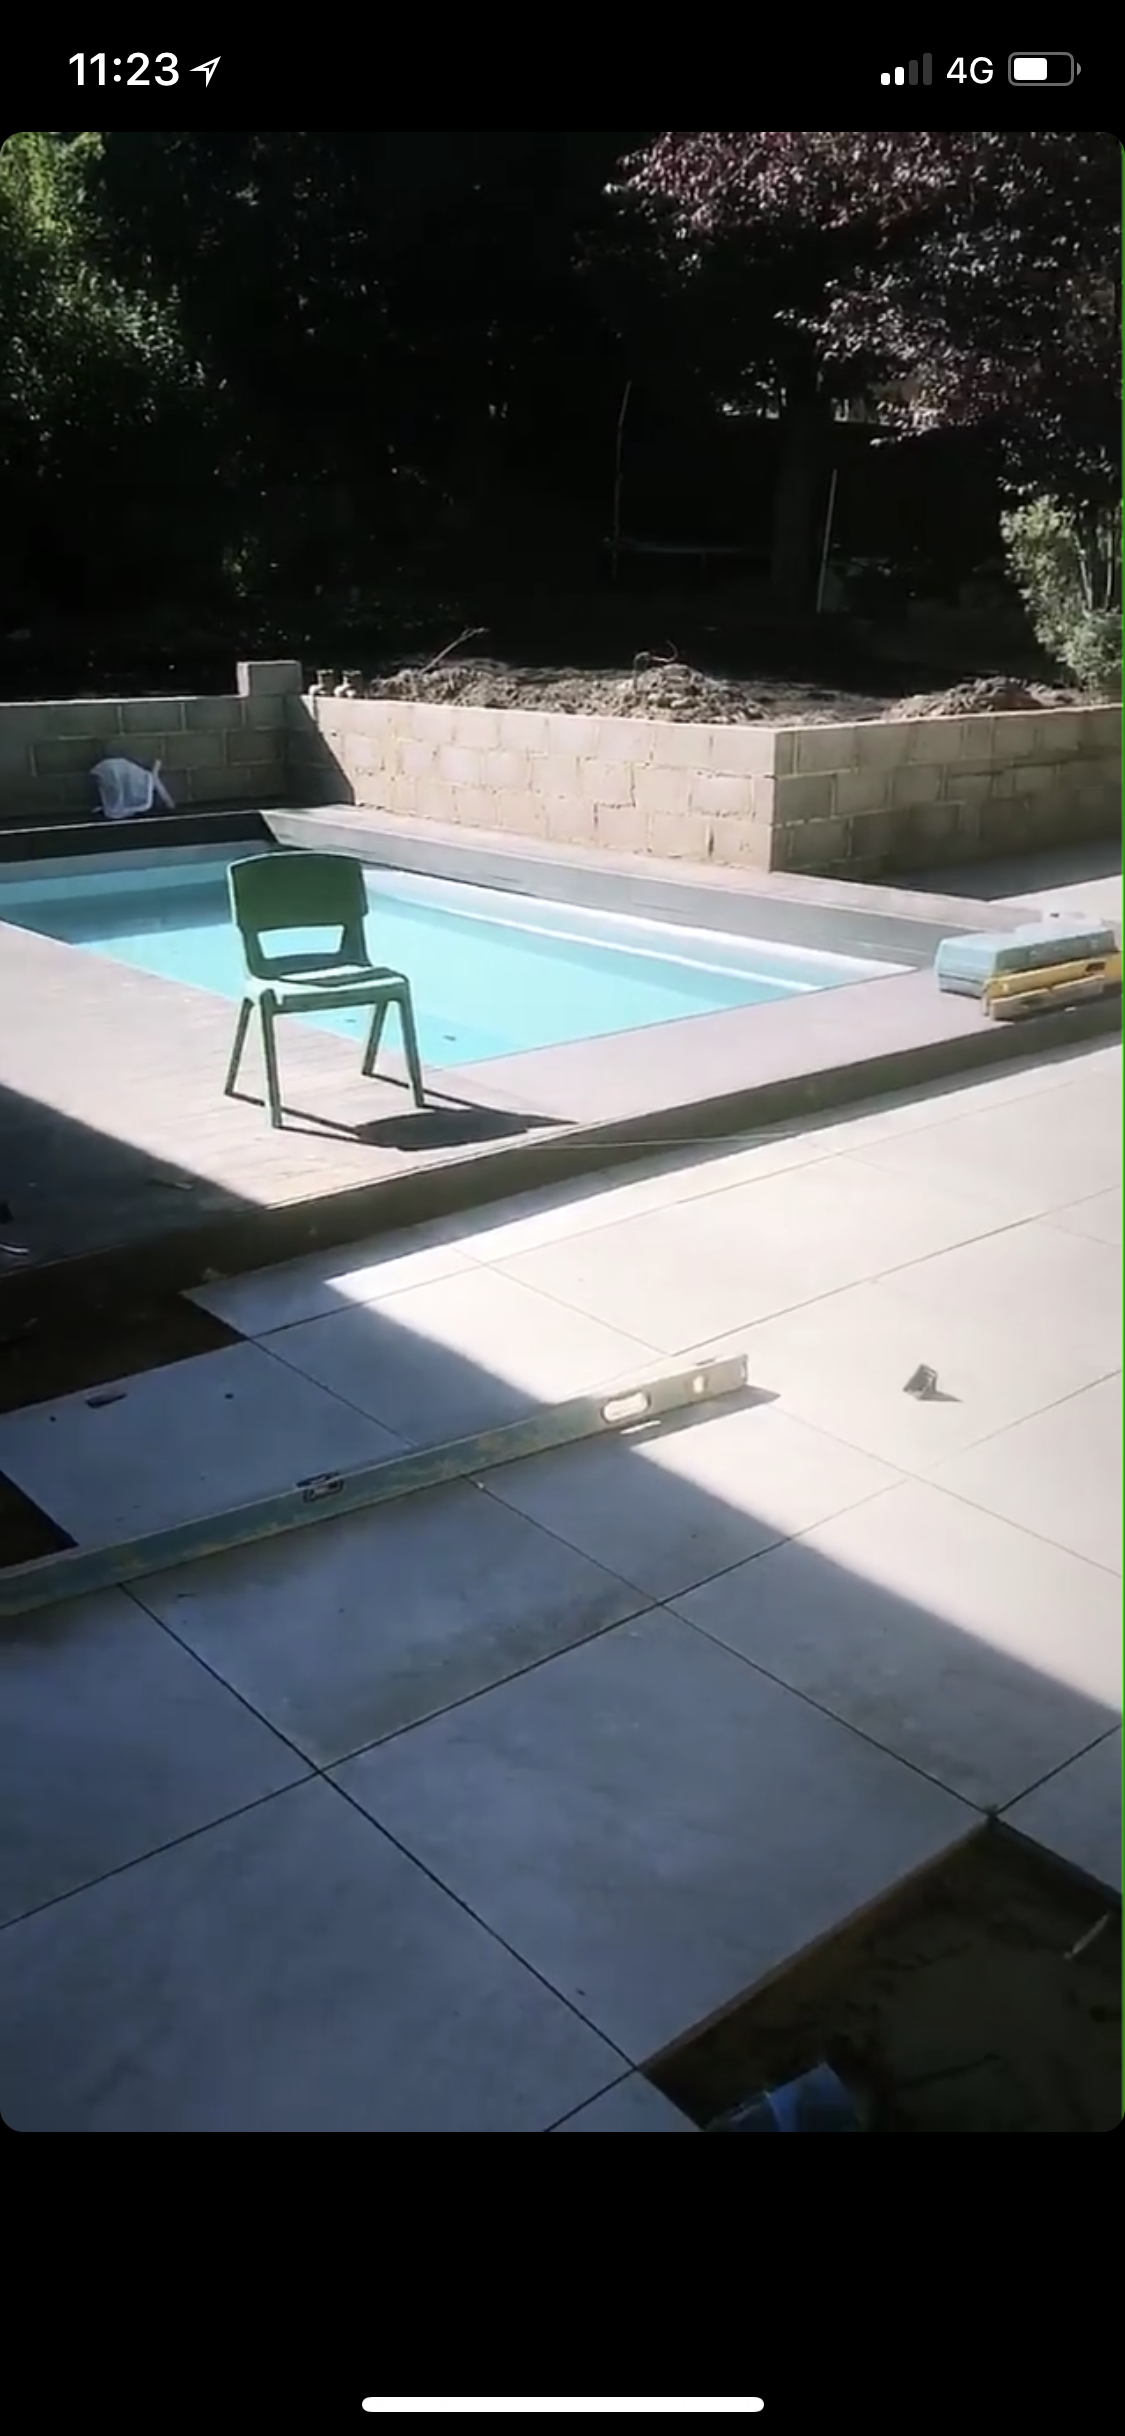
next it was time to start paving. we fully prepared the area, levelling the slope off and laying type 1 with a membrane, and then compacted it down for a solid base. we then started laying the grey porcelain.
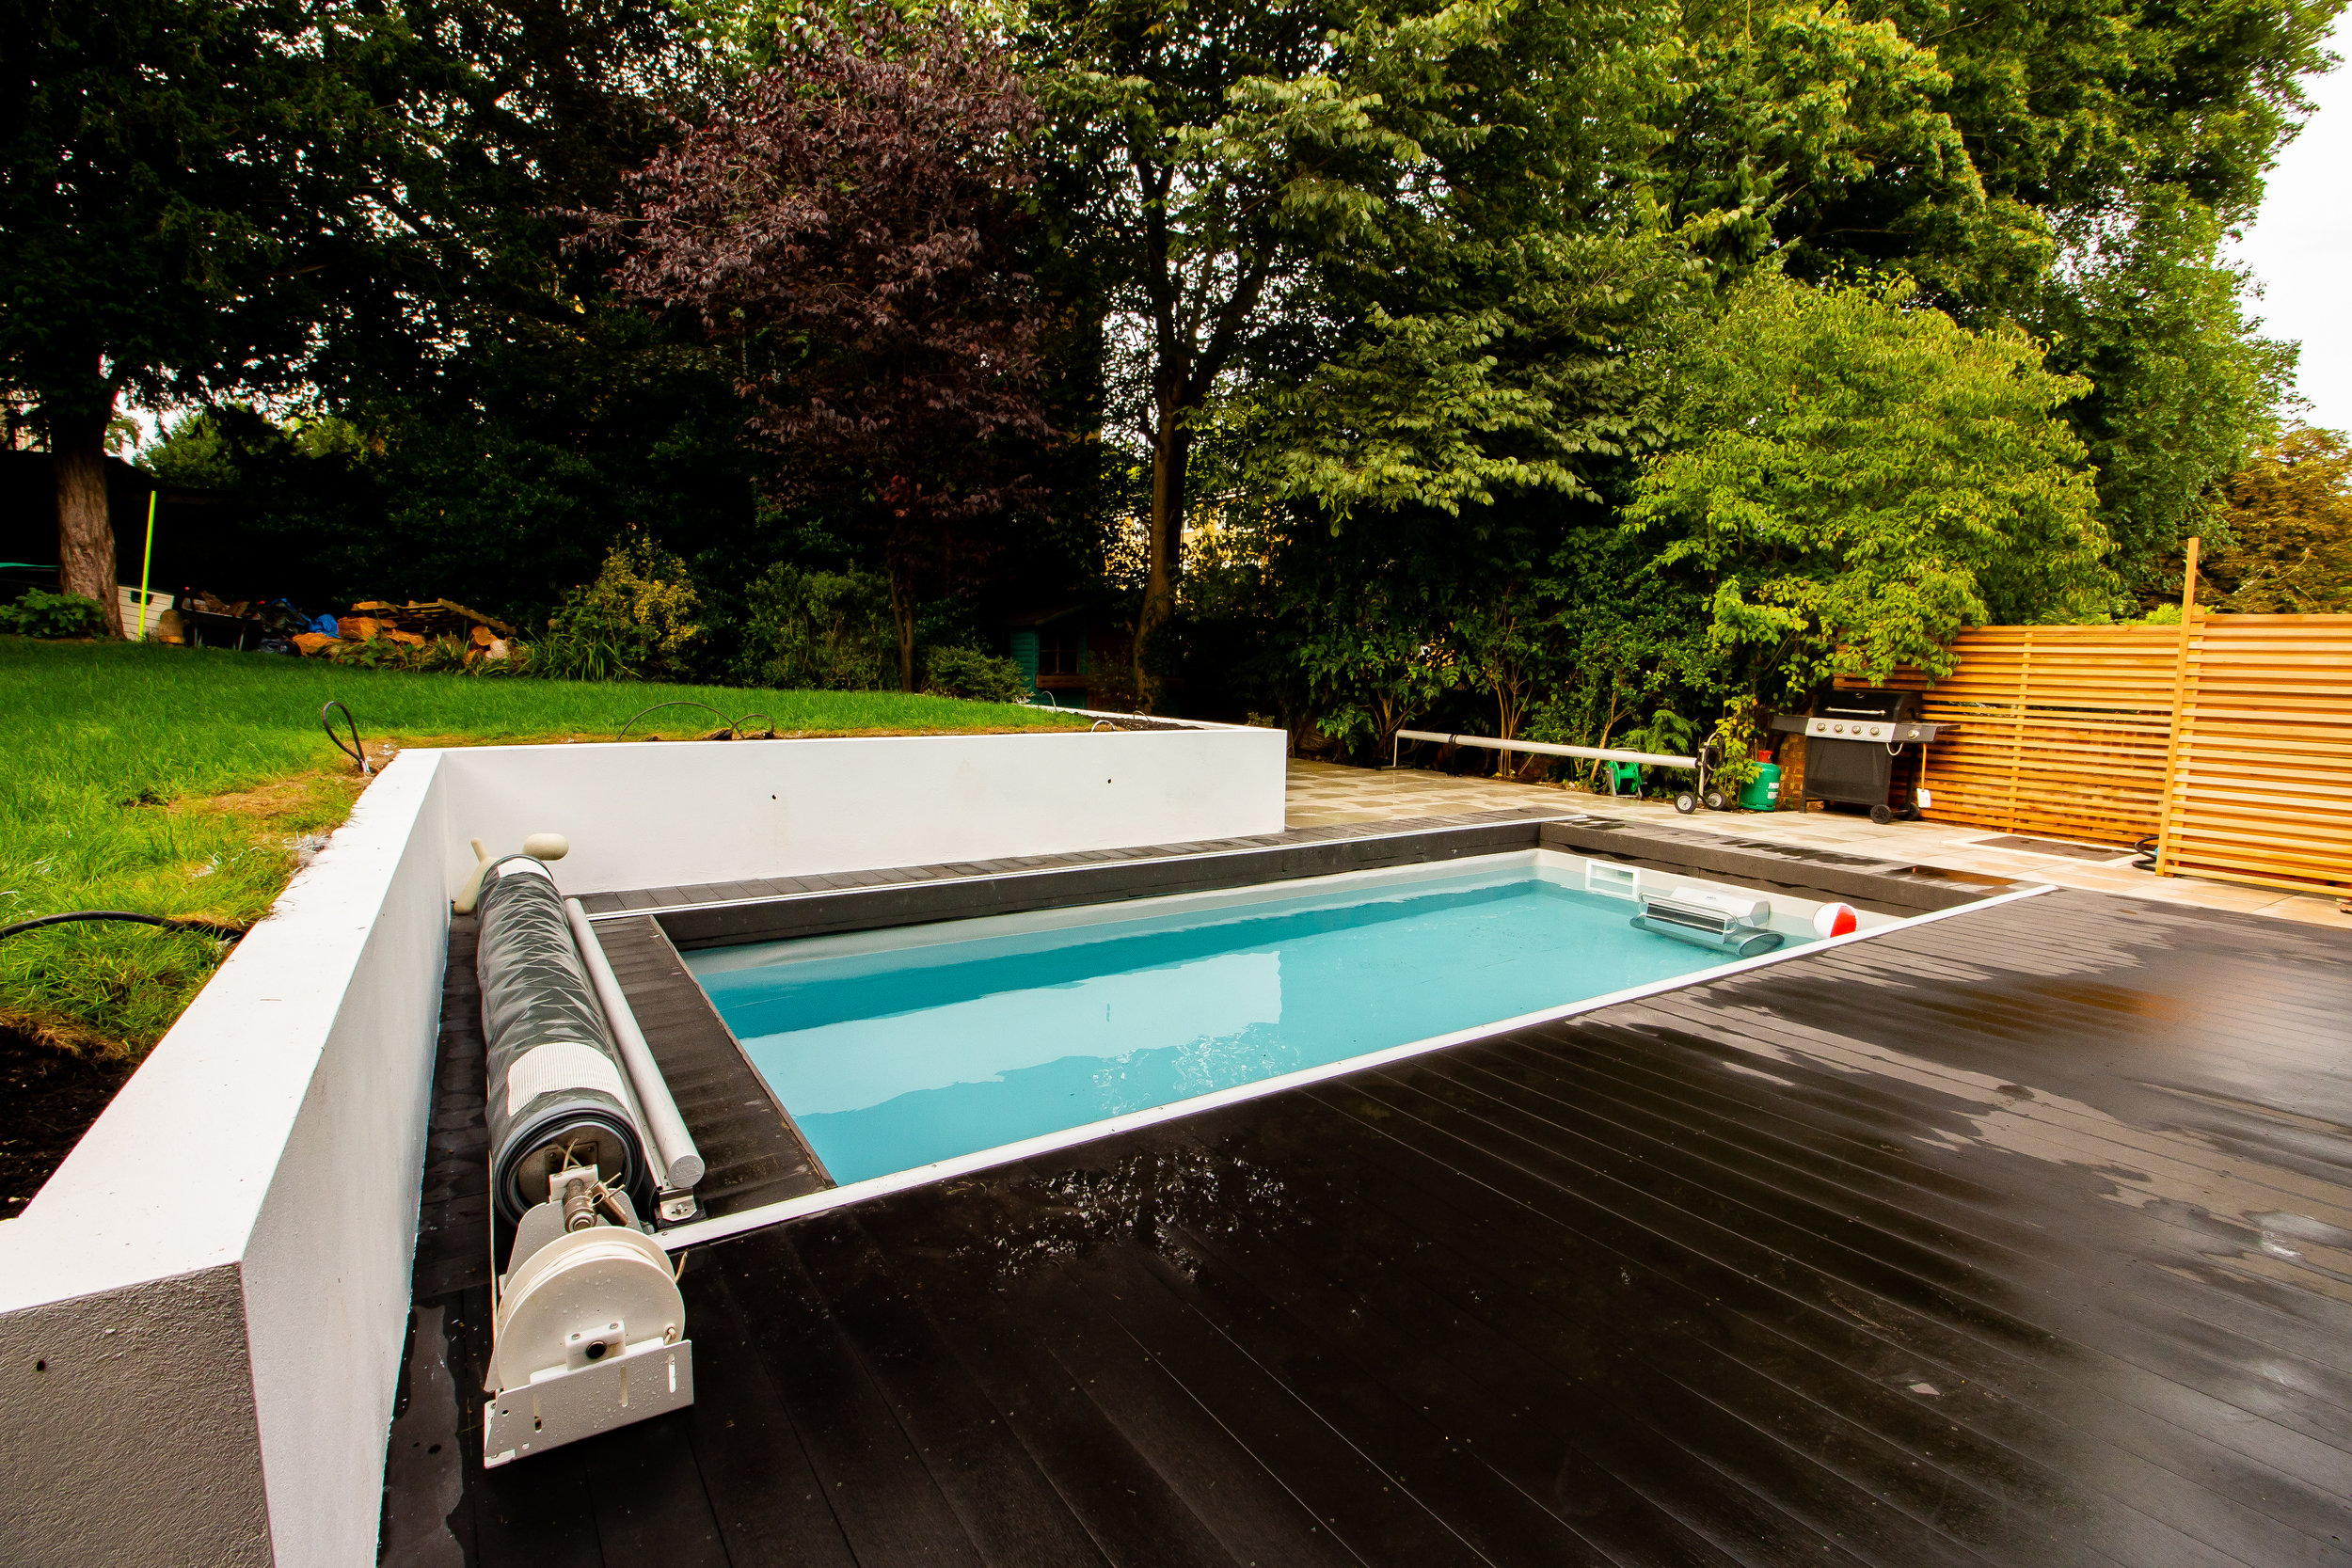
We next fitted the swimming pool cover, installing the rails along the side of the pool and fitting the manual pully system at the far end.
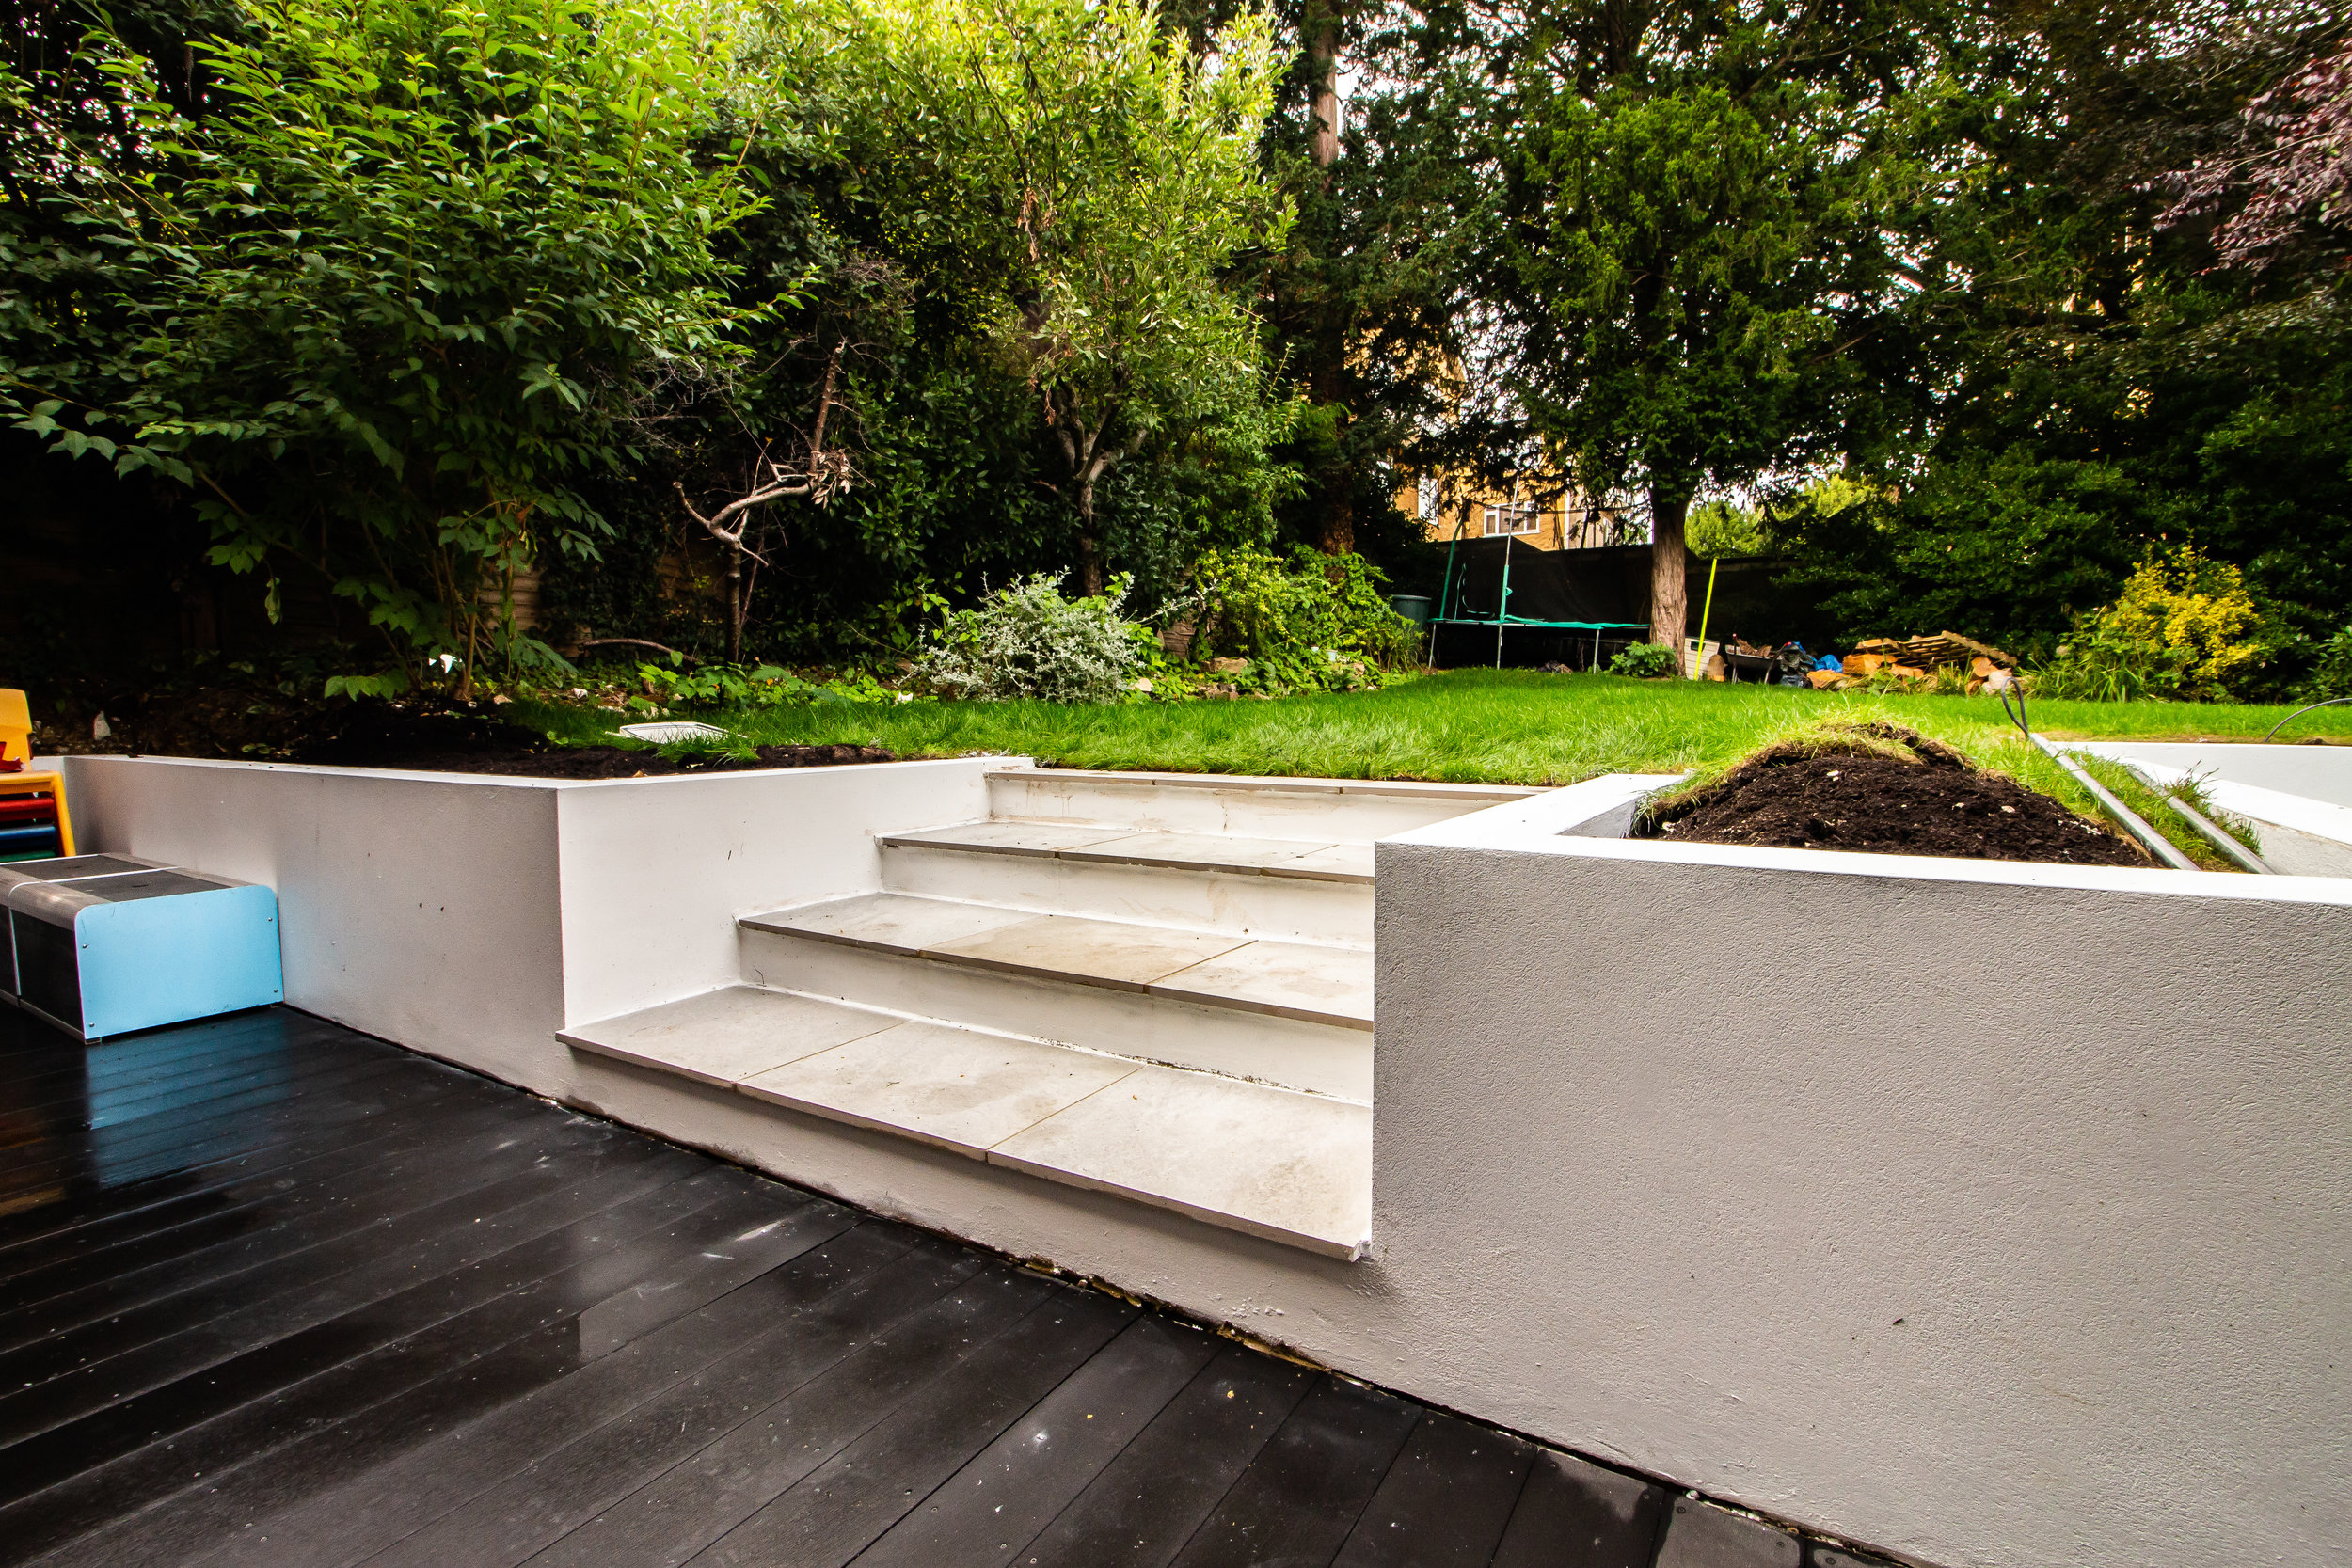
With the paving complete, all that was left to do was small fiddly jobs here and there - electricians came to connect lights and counter current cables to mains sockets, top soil and turf was laid on the garden, the wall was rendered and painted all around, porcelain slabs were laid on the step area of the wall, pavin grouted, and sleeper steps were put in at the back of the garden by the shed.
we also then fenced off the pool house and hydraulic pump for the counter current using cedar fencing.
FINISHED RESULT